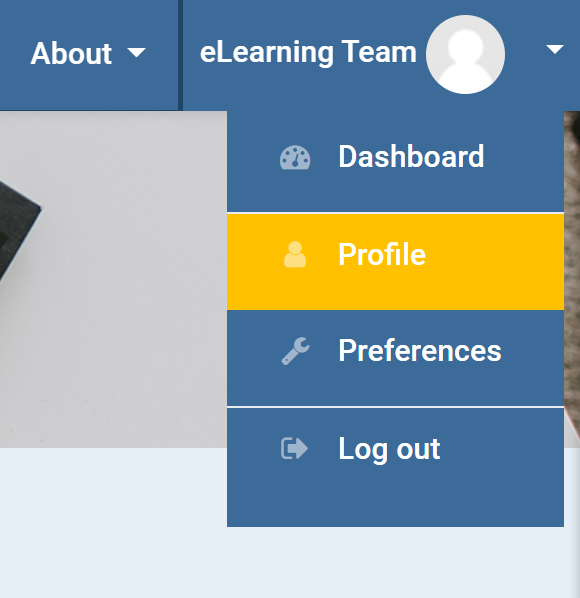
Trainees: TMP user instructional videos - Assessments
Trainees: TMP user instructional videos - Assessments
The RACP is redesigning, developing and implementing new curricula across our Basic Training and Advanced Training Programs.
The new curricula follows a competency-based medical education framework.
The short videos explain the changes to the new RACP curricula.
Instructional video - Submit a learning capture
29 STEPS
1. This tutorial introduces the latest TMP system to help you get familiar with it.
All data used is for demonstration purposes only and does not reflect real trainee records.
2. This tutorial demonstrates steps to complete a Learning Capture.
To begin, click Quick Create from the top menu to begin creating a new assessment.
3. The Quick Create page opens, providing guidance on selecting the appropriate assessment options.
Click Create a Learning Capture to start creating a Learning Capture.
4. Under Trainee Details, the Training Program and Training Phase fields are pre-populated.
Update the Date of Learning Experience if required, then click Save and Next to progress.
5. Click Select
6. Next step is to fill out the Learning Capture Details section.
Click Type of Learning to choose from the dropdown menu.
Select the Type of Learning from the dropdown.
7. Next step is to give the Learning Capture a Title.
This should be specific and clearly identify the focus for learning.
8. Scroll down and add a Description of Activity that details the scope of the learning.
9. Type a response to the question What did you learn?
This should highlight a deepened understanding of the topic explored.
10. Type a response to the question How will you apply this learning in the future?
This should show how the learning translates into actionable steps with a specific scenario listed.
11. Please click on the magnify look up to search for the primary learning goal to which this learning applies.
12. Checkbox the primary learning goal and navigate to Select to progress.
13. There is an option to upload supporting documentation by selecting Add files.
Please ensure documents have been de-identified of patient information before uploading.
14. Click Declaration.
15. You are now ready to check the Declaration and confirm that the Learning Capture including attachments has been de-identified.
16. Click Submit to complete the Learning Capture.
17. A Success message noting the Learning Capture is complete.
The next step is optional, you may choose to Exit or you can choose to invite feedback from an assessor.
18. To do this, scroll down and click Add Feedback Request.
19. Choose which related Assessor you would like to request feedback from.
You may choose 'Others' to request feedback from anyone not linked to you. You will enter their email address so they can complete a webform.
20. Click Rotation Supervisor Name.
21. Click Select.
22. In this example, we will choose Rotation Supervisor.
Now select the Rotation Supervisor's name.
23. Now you can type a brief Personal Message to your Assessor.
Click Submit to progress.
24. View the Feedback Request Status which now reads as Invited.
Your Assessor will receive an email notification to submit feedback.
25. Once the assessor has provided feedback, you will receive an email notification.
Click Exit.
26. To create a learning capture in alternative way.
Go to My Training and then Assessment Requirements Due Next, scroll to Learning Capture, Select Add/Edit.
Continue as usual to complete.
27. You can also complete an Observation Capture through the Training Program link.
Click View details.
28. Select Assessment Requirements.
29. Scroll to Learning Captures to continue.
That's it. You're done. Congratulations on completing this tutorial!
Here's an interactive tutorial
https://www.iorad.com/player/2721346/Quick-create-Learning-Capture---Trainee-experience
Next step

Instructional video - Submit an observation capture
40 STEPS
1. This tutorial introduces the latest TMP system to help you get familiar with it.
All data used is for demonstration purposes only and does not reflect real trainee records.
2. This tutorial demonstrates steps to complete an Observation Capture.
To begin, click Quick Create from the top menu to begin creating a new assessment.
3. The Quick Create page opens, providing guidance on selecting the appropriate assessment options.
Click 'Create an Observation Capture' to start creating an Observation Capture.
4. Under Trainee Details, the Training Program and Training Phase fields are pre-populated.
Update the Date of Observation if required, then click Save and Next to progress.
5. Next step is to fill out the Observation Capture Details section.
Click Observation Capture Type to choose from the dropdown menu.
Select the Observation Capture Type.
6. Fill out the Summary of Activity field with a brief description of the activity.
7. Select the Complexity from the dropdown list (High/Medium/Low) as relevant.
8. Then select the Primary Learning Goal, related to the observation, using the magnify lookup.
9. Checkbox the Primary Learning Goal.
10. Click Select to progress.
11. Then click Save and Next to progress to the next section.
12. Next, you will be asked to select what Learning Goal Components were covered during the observation.
Trainees do not need to demonstrate every single component of an EPA in a single observation capture.
13. To do this, check Yes to the components under the Primary Learning Goal that were observed.
14. You will also need to check No for the components not observed.
15. Continue until all components are recorded.
16. Next section is Trainee Reflection.
You must fill in this section.
Please note that your assessor will be able to view what you enter in your reflection.
17. Write a response for What did you do well?
18. Write a response for What could you do to improve next time?
19. Assessor Reflection
A range of assessors can provide feedback and ratings in observation captures.
The assessor does not need to be the assigned DPE or supervisor, nor does it need to be a Fellow of the College.
20. Trainees can either choose to leave the Assessor Feedback section blank, for their assessor to fill out.
This form will then be sent to the assessor once the trainee submits the Observation Capture.
21. Or trainees can choose to fill this section out using information that is dictated to them by their Assessor.
This information will be sent to the Assessor to verify for accuracy.
Assessors can make any updates to the Assessor Feedback section.
22. To choose a level of supervision required as outlined by your assessor, click the magnify lookup.
23. Check the rating scale, as outlined by your Assessor.
Then click Select to progress.
24. Now write a response to What did the trainee do well?, as outlined by your Assessor.
25. Now write a response to What could the trainee improve upon to improve their performance?, as outlined by your Assessor.
This information will be sent to the Assessor for verification. They will be able to update this information as needed.
26. Now you need to add a Feedback Request to send to your Assessor.
To do this, click Add Feedback Request.
27. Click the dropdown to choose the Assessor Role out of 'DPE', 'Education Supervisor', 'Rotation Supervisor', or 'Others'.
If you select Others. A window will open for you to enter contact details of the Assessor.
28. Others includes non-College assessors or anyone not linked to the trainee, as a supervisor, who will complete the Observation Capture, via a webform that is emailed to them.
They don't need to create a College account or login.
29. After the Supervisor assessor name is populated, click Personal Message.
30. Add a personal message, and then Save to return to the main page.
31. Review and check the Trainee Declaration.
32. Checkbox the Declaration.
33. If you would like to Save and Exit, you can click the button in the bottom righthand corner.
If you are ready to submit, check Ready to Submit.
34. To submit, click the Submit button.
This will send the Observation Capture to the Assessor you added a Feedback Request for.
35. You will now see a success confirmation message.
Your Assessor will be notified to review the Observation Capture.
36. Click Exit
37. To create an observation capture in an alternative way.
Go to My Training and then Assessment Requirements Due Next, scroll to Observation Capture, Select Add/Edit.
Continue as usual to complete.
38. You can also complete an Observation Capture through the Training Program link.
39. Select Assessment Requirements.
40. Scroll to Observation Captures to continue.
That's it. You're done. Congratulations on completing this tutorial!
Here's an interactive tutorial
https://www.iorad.com/player/2725173/Quick-Create-an-Observation-Capture---Trainee-experience
Next step
Instructional video - Add a comment to an observation capture
28 STEPS
1. A trainee can choose to add a comment to an Observation Capture after the Assessor has provided feedback. Adding a comment is optional.
The first step is to open Home and click My Training.
2. Click your Training Program.
3. Click the Assessment Requirements tab.
4. Click the Observation Captures for the Phase Period.
5. A new page will open. Scroll down to Observation Captures to find the record.
6. Click the action menu dropdown.
7. Now click View details to open the record.
8. The Observation Capture will open. Scroll through the form to view the details, including any changes or additions from the Assessor.
9. The Comments section is at the bottom of the form. Scroll down to view the Observation Capture details.
10. View the Observation Capture Details and Learning Goal. Continue to scroll down.
11. View the Learning Goal Components. Continue to scroll down.
12. View your Trainee Reflection. Continue to scroll down.
13. Here you can view the finalised feedback from your Assessor. Continue to scroll down.
14. View the Feedback Requests. Continue to scroll down.
15. View the Declarations. Continue to scroll down.
16. The Comments section is now available to complete. This is an optional step. The assessor will be able to see any comments added.
17. Click Add Comment.
18. A new window will open. You can type your optional comment in this box.
19. Click Submit to finalise.
20. You will see a confirmation message.
21. Click close to go back to the record.
22. The comment may take a moment to appear.
23. If the comment does not appear, scroll up and exit the record.
24. Then click View details to go back into the record.
25. Scroll down to the Comments section.
26. You will now see the comment here. Assessors can also add a comment.
27. Scroll up and click Exit.
28. That's it. You're done.
Here's an interactive tutorial
** Best experienced in Full Screen (click the icon in the top right corner before you begin) **Instructional video - Submit a rotation progress report (Basic training only)
57 STEPS
1. This tutorial introduces the latest TMP system to help you get familiar with it.
All data used is for demonstration purposes only and does not reflect real trainee records.
2. In this demonstration, a Trainee completes a Basic Training Rotation Progress Report, assessing their performance, and providing reflective comments on their progress.
3. From the Home page, click on My Training to begin.
4. The 'Rotation Progress Report' can be accessed through the 'Training Programs' link or via 'Assessment Requirements Due Next'.
5. In this tutorial, we will continue using Assessment Requirements Due Next.
6. Scroll down until you locate the 'Rotation Progress Report' for your current phase.
Then click the Actions button.
7. Click 'Add/Edit' to open the Rotation Progress Report assessment page.
8. The Rotation Progress Report page will open.
From here, click Add Rotation Progress Report to begin a new report.
9. In the Trainee and Program Details section, the Phase field is automatically populated with the trainee’s current phase of training.
10. If the phase needs to be updated, use the Look up function to select the appropriate Phase.
11. Click Save & Next to progress.
12. In the Rotation Plans section, select the Rotation Plan linked to this report.
Ensure you read the instruction text and review the checklist before continuing.
13. If the wrong Rotation Plan has been added, you can remove it.
Click Remove, then use Add Rotation Plan to select the correct plan. If the Rotation Supervisor requires updating. It can be done at this stage.
14. Click Save & Next to move, to the Reports page.
In the next section, you will complete the report review actions.
15. On the Reports page, a Reports Checklist sidebar is available to assist you.
The sidebar can be toggled open or closed as needed.
It offers clear visual and structural cues to help guide you through the report.
16. The sidebar displays the completion status of each action requirement, and identifies the intended user for each section.
It also provides clarity on the supervisor review process, and improves visibility of supervisor actions and progress.
17. Throughout the Reports page, instruction text is provided to guide you.
It clearly indicates which sections are view-only and which require action.
Trainees are encouraged to review their assessments as part of completing their progress report.
18. In the Rotations section, you will see a summary of the selected rotation.
To explore further details, such as learning goal opportunities and custom goals, click View Details as shown.
19. The detailed Rotation Plan view opens for your review, providing information to support completion of the report.
20. Once reviewed, click Close.
21. The 'Progress Review Reports' section displays all previously completed reports for the selected Phase.
You can review these reports.
In this example, this is the first Report of the current Phase.
22. The Phase Requirements section provides an overview of assessment outcomes for the selected Phase.
23. Review these assessments to support completion of your progress report.
Click the Actions button and then View details to view specific assessments.
Once all requirements are reviewed, move to the next section of the report.
24. Navigating Back to Report
After reviewing a Phase requirements assessment, click the browser back button, to return to the progress report.
25. Navigate to the 'Program Level Requirements' section to review relevant assessment requirements.
These requirements vary by training program, and some programs may not include this section.
26. In the Learning Courses section, you can view the status of your training program’s phase learning course requirements.
Review this section to ensure all required courses are completed or in progress.
27. The Assessments mapped to Learning Goals section presents assessment ratings—such as observation capture ratings—mapped against learning goals.
Click the link to open and review the full details for the report.
28. In the Learning Goals section, the Trainee and Supervisor(s) evaluate performance against each learning goal using a rating scale appropriate to the learning goal type.
All learning goals must be rated.
29. The trainee completes a self-assessment across all learning goals.
30. For each Learning Goal, click the Select Rating field and select the appropriate rating based on performance.
Repeat this step for all learning goals to ensure each one has been assessed.
31. Repeat for remaining learning goals.
32. Final Learning Goal Rating
You are now at the final Learning Goal.
Select the final rating to complete this section.
33. Once you have finished entering ratings, click Save Changes.
This ensures your progress is saved, before moving to another part of the report.
34. After saving your ratings, the Report Checklist will update to show 'Learning Goal Rating' Complete in green, indicating this section has been completed.
This may a take few seconds to update.
35. In the Trainee Leave section, record any leave taken during your rotation period.
Select 'Add Leave' and complete each required field before submitting.
36. Select the checkbox to confirm that no other leave was taken during this period, aside from any leave already recorded as an interruption.
37. Once checked, the Report Checklist will show Trainee leave as Complete.
38. In the Trainee Rotation Summary Comments section, the trainee reflects on their rotation experience by responding to the following questions:
What went well during the rotation?
What could you do to improve in the future?
39. To enter your comments, click Add, then complete the required fields.
40. Enter a detailed response for 'What did you do well during this Rotation of training?'
41. Enter a detailed response for 'What could you do to improve in the future?'
42. Select the checkbox to confirm that you have had the opportunity to discuss the content of the report with your supervisor before submission.
43. After entering your comments, click Submit to save, and return to the report’s main page.
44. After submission, the Trainee Rotation Summary Comments section will be marked as Complete, indicating this step has been finalised.
45. To view open or closed training conditions, select the link provided to open the details.
46. Click here to open and update training conditions as needed.
47. The next section is Trainee Declaration.
Review the declarations, then select the checkbox to progress to 'Ready to Submit'.
Trainee Declaration will be marked as Complete.
48. Once you are ready to submit your report, click Ready to Submit.
If you are not ready, select Save to exit and return later to complete the submission.
49. Once you are ready to submit your report, click Ready to Submit.
If you are not ready, select Save to exit and return later to complete the submission.
50. Click Submit to finalise the report.
This will move the report to the next stage for Rotation Supervisor review.
51. A success message will appear to confirm that your report has been successfully submitted.
Click Exit to return to the Assessment page.
You have now completed all steps in this tutorial—well done!
52. Cancel a draft Rotation Progress Report
Cancel a draft if the wrong Rotation Plan was chosen, there are data errors, it was created by mistake, or information is incomplete or incorrect.
53. Click the action button and then select Cancel.
54. A Cancel Rotation Progress Report message will surface.
Click Proceed to cancel.
If you do not want to cancel, then select Cancel.
55. Click Proceed.
56. A success message will appear advising that this process may take time to reflect.
57. After a couple of minutes, refresh your page. The cancelled Report will be removed.
Click Exit to continue.
That's it. You're done! Congratulations on completing this tutorial.
Here's an interactive tutorial
Next step
Instructional video - Submit a phase progress report (Basic training only)
54 STEPS
1. This tutorial introduces the latest TMP system to help you get familiar with it.
All data used is for demonstration purposes only and does not reflect real trainee records.
2. The Phase Progress Report ensures trainees are developing the knowledge, behaviours, and competencies required at each stage of training.
Phase Progress Reports should be completed by Basic Trainees.
3. From the Home page, click on My Training to begin.
4. The Phase Progress Report can be accessed through the Training Programs link or via Assessment Requirements Due Next.
In this tutorial, we will continue using Assessment Requirements Due Next.
5. The Phase Progress Report can be accessed through the Training Programs link or via Assessment Requirements Due Next.
In this tutorial, we will continue using Training Programs link.
6. Click on the Training Program hyperlink or expand the downward arrow towards the right and click on the Actions button.
7. Next click Assessment Requirements
8. Click Phase Progress Report
9. Click action menu
10. Scroll down until you locate the Phase Progress Report for your current phase.
Then click the Actions button. Click View/Edit to open the Phase Progress Report assessment page.
11. Click Phase Progress Reports
12. The Phase Progress Report page will open.
From here, click Add Phase Progress Report to begin a new report.
13. In the Trainee and Program Details section, the Phase field is automatically populated with the trainee’s current phase of training.
14. Click Save & Next to progress.
15. The sidebar displays the completion status of each action requirement and identifies the intended user for each section.
It also provides clarity on the supervisor review process and improves visibility of supervisor actions and progress.
16. Throughout the Reports page, instruction text is provided to guide you.
It clearly indicates which sections are view-only and which require action.
17. Trainees are encouraged to review their assessments as part of completing their progress report.
18. The Progress Review Reports section displays all previously completed reports for the selected Phase.
You can review these reports to support your current report.
19. The Phase Requirements section provides an overview of assessment outcomes for the selected Phase.
20. Review these assessments to support completion of the progress report.
Click the actions button and then View details to view specific assessments.
21. Click View details
22. Navigating Back to Progress Report
After reviewing, click the browser back button to return to the progress report.
23. Once all requirements are reviewed, move to next section of the report.
24. Navigate to the Program Level Requirements section to review relevant assessment requirements.
These requirements vary by training program, and some programs may not include this section.
25. In the Learning Courses section, you can view the status of your training program’s phase learning course requirements.
Review this section to ensure all required courses are completed or in progress.
26. The Assessments mapped to Learning Goals section presents assessment ratings—such as observation capture ratings—mapped against learning goals.
Click the link to open and review the full details for the report.
27. Click here
28. Scroll down to view observation captures ratings and see what learning goals were applied to a learning capture.
29. Close the page once complete to return to the Report.
30. In the Learning Goals section, the Trainee and Supervisor(s) evaluate performance against each learning goal using a rating scale appropriate to the learning goal type.
All learning goals must be rated.
31. The Learning Goal checklist will change to Complete once done.
32. For each Learning Goal, click the Select Rating field and select the appropriate rating based on performance.
Repeat this step for all learning goals to ensure each one has been assessed.
33. To view previous Rotation or Phase report rating ratings, click the Actions button next to each Learning Goal to expand the details.
34. Repeat for remaining learning goals.
35. Final Learning Goal Rating
You are now at the final Learning Goal.
Select the final rating to complete this section.
36. Once you have finished entering ratings, click Save Changes.
This ensures your progress is saved before moving to another part of the report.
37. After saving your ratings, the Report Checklist will update to show Learning Goal Rating Complete in green, indicating this section has been completed.
This may take a few seconds to update.
38. Next action section is Trainee Leave.
39. Trainee Leave cannot be added or updated from within a Phase Progress Report.
If leave has been added to the Trainee record or in a previous Rotation Progress Report, it will be displayed in the Phase Progress Report.
40. Select the checkbox to confirm that no other leave was taken during this period, aside from any leave already recorded as an interruption.
41. Once checked, the Report Checklist will show Trainee leave as Complete.
If the report has been initiated by the Supervisor, they can complete the Trainee Leave section on behalf of the trainee, if required.
42. Next action section is Trainee Summary Comments.
43. In the Trainee Summary Comments section, the trainee reflects on their Phase experience by responding to the following questions:
What did you do well during this phase of training?
What could you do to improve in the future?
44. To enter your comments, click Add, then complete the required fields.
45. Enter a detailed response for What did you do well during this phase of training?
46. Enter a detailed response for What could you do to improve in the future?
47. Select the checkbox to confirm that you have had the opportunity to discuss the content of the report with your supervisor before submission.
48. After entering your comments, click Submit to save and return to the report’s main page.
49. After submission, the Trainee Summary Comments section will be marked as Complete, indicating this step has been finalised.
50. The next section is Trainee Declaration.
Review the declarations, then select the checkbox to progress to Ready to Submit.
Trainee Declaration will be marked as Complete.
51. Once you are ready to submit your report, click Ready to Submit.
If you are not ready, select Save to exit and return later to complete the submission.
52. In the checklist, the Submit step will remain Incomplete until you submit the report and reopen it.
Once submitted, the Report Status at the bottom of the checklist will change to Submitted for Supervisor Review.
53. Click Submit to finalise the report.
This will move the report to the next stage for Education Supervisor review.
54. A success message will appear to confirm that your report has been successfully submitted.
Click Exit to return to the Assessment page.
You have now completed all steps in this tutorial—well done!
Here's an interactive tutorial
Next step
TMP Try it - Basic Trainee checks exam result
12 STEPS
1. This tutorial demonstrates the latest version of the TMP system and is provided for familiarisation purposes only. All datasets used are illustrative and do not represent actual current or historical Trainee data.
2. This tutorial demonstrates how a Trainee can review an examination outcome inside the TMP.
3. The first step is to open Home and click My Training
4. Click your program where your are viewing your examination result. In this case, Geriatric Medicine (AM) 2025 is used in this example which is not based on actual requirements.
5. Click Assessment Requirements
6. Scroll down to Program Level Requirements
7. To filter, enter exam in the search window.
8. In this example we can see that the examination requirement is Completed meaning the Trainee has received a pass or exception examination outcome. Click the Actions button to view the specific outcome.
9. Click View details
10. Scroll down to next section of the page.
11. In this example the Trainee has a Pass outcome.
12. That's it. You're done.
Here's an interactive tutorial
https://www.iorad.com/player/2646214/How-to-view-an-examination-outcome
Next step
Instructional video - Submit a rotation progress report (Advanced training only)
65 STEPS
1. This tutorial introduces the latest TMP system to help you get familiar with it.
All data used is for demonstration purposes only and does not reflect real trainee records.
2. In this demonstration, a Trainee completes an Advanced Training Rotation Progress Report (RPR), assessing their performance and providing reflective comments on their progress.
3. In this demonstration, a Trainee completes an Advanced Training Rotation Progress Report (RPR), assessing their performance and providing reflective comments on their progress.
4. Click on My Training to begin.
5. The Rotation Progress Report can be accessed through the Training Programs link or via Assessment Requirements Due Next.
6. In this tutorial, we will continue using Assessment Requirements Due Next.
7. Scroll down until you locate the Rotation Progress Report for your current phase.
Then click the Actions button.
8. Click Add/Edit to open the Rotation Progress Report assessment page.
9. The Rotation Progress Report page will open.
From here, click Add Rotation Progress Report to begin a new report.
10. In the Trainee and Program Details section, the Phase field is automatically populated with the trainee’s current phase of training.
11. If the phase needs to be updated, use the Look up function to select the appropriate Phase.
12. Click Save & Next to progress.
13. In the Rotation Plans section, select the Rotation Plan linked to this report.
Ensure you read the instruction text and review the checklist before continuing.
14. If the wrong Rotation Plan has been added, you can remove it.
Click Add Rotation Plan to select the correct plan.
15. Note selected Rotation Plan.
16. Click Add to progress.
17. Click Remove, then use Add Rotation Plan to select the correct plan.
If the Rotation Supervisor requires updating. It can be done at this stage.
18. Select the Rotation Plan you want to remove.
Click the Actions button, then select Remove.
If the Rotation Supervisor requires updating. It can be done at this stage.
19. Click Save & Next to move to the Reports page.
In the next section, you will complete the report review actions.
20. On the Reports page, a Reports Checklist sidebar is available to assist you.
The sidebar can be toggled open or closed as needed.
It offers clear visual and structural cues to help guide you through the report.
21. The sidebar displays the completion status of each action requirement and identifies the intended user for each section.
It also provides clarity on the supervisor review process and improves visibility of supervisor actions and progress.
22. Throughout the Report page, instruction text is provided to guide you.
It clearly indicates which sections are view-only and which require action.
Trainees are encouraged to review their assessments as part of completing their progress report.
23. In the Rotations section, you will see a summary of the selected rotation.
To explore further details, such as learning goal opportunities and custom goals, click View Details as shown.
24. The detailed Rotation Plan view opens for your review, providing information to support completion of the report.
25. Once reviewed, click Close.
26. The Progress Review Reports section displays all previously completed reports for the selected Phase.
You can review these reports to support your current report.
In this example, this is the first Report of the current Phase.
27. The Phase Requirements section provides an overview of assessment outcomes for the selected Phase.
28. Review these assessments to support completion of your progress report.
Click the Actions button and then View details to view specific assessments.
Once all requirements are reviewed, move to next section of the report.
29. Navigating Back to Progress Report
After reviewing a Phase requirements assessment, click the browser back button to return to the progress report.
30. Navigate to the Program Level Requirements section to review relevant assessment requirements.
These requirements vary by training program, and some programs may not include this section.
31. In the Learning Courses section, you can view the status of your training program’s phase learning course requirements.
Review this section to ensure all required courses are completed or in progress.
32. The Assessments mapped to Learning Goals section presents assessment ratings—such as observation capture ratings—mapped against learning goals.
Click the link to open and review the full details for the report.
33. Click click here
34. In the Learning Goals section, the Trainee and Supervisor(s) evaluate performance against each learning goal using a rating scale appropriate to the learning goal type.
All learning goals must be rated.
35. The trainee completes a self-assessment across all learning goals.
36. For each Learning Goal, click the Select Rating field and select the appropriate rating based on performance.
Repeat this step for all learning goals to ensure each one has been assessed.
37. Click Select Rating
38. Repeat for remaining learning goals.
39. Final Learning Goal Rating
You are now at the final Learning Goal.
Select the final rating to complete this section.
40. Once you have finished entering ratings, click Save Changes.
This ensures your progress is saved before moving to another part of the report.
41. After saving your ratings, the Report Checklist will update to show Learning Goal Rating Complete in green, indicating this section has been completed.
This may a few seconds to update.
42. In the Trainee Leave section, record any leave taken during your rotation period.
Select Add Leave and complete each required field before submitting.
43. Select the Leave Type and complete the remaining fields in the form.
Click Submit to return to the main report.
44. Select the checkbox to confirm that no other leave was taken during this period, aside from any leave already recorded as an interruption.
45. Once checked, the Report Checklist will show Trainee leave as Complete.
46. In the Trainee Rotation Summary Comments section, the trainee reflects on their rotation experience by responding to the following questions:
What went well during the rotation?
What could you do to improve in the future?
47. To enter your comments, click Add, then complete the required fields.
48. Enter a detailed response for What did you do well during this Rotation of training?
49. Enter a detailed response for What could you do to improve in the future?
50. Select the checkbox to confirm that you have had the opportunity to discuss the content of the report with your supervisor before submission.
51. Click Comment Date
52. After entering your comments, click Submit to save and return to the report’s main page.
53. After submission, the Trainee Rotation Summary Comments section will be marked as Complete, indicating this step has been finalised.
54. To view open or closed training conditions, select the link provided to open the details.
55. Click here to open and updated training conditions as needed.
56. The next section is Trainee Declaration.
Review the declarations, then select the checkbox to progress to Ready to Submit.
Trainee Declaration will be marked as Complete.
57. Once you are ready to submit your report, click Ready to Submit.
If you are not ready, select Save to exit and return later to complete the submission.
58. Click Submit to finalise the report.
This will move the report to the next stage for Rotation Supervisors review.
59. A success message will appear to confirm that your report has been successfully submitted.
Click Exit to return to the Assessment page.
60. Cancel a draft Rotation Progress Report
Cancel a draft if the wrong Rotation Plan was chosen, there are data errors, it was created by mistake, or information is incomplete or incorrect.
61. Click the action button and then select Cancel.
62. A Cancel Rotation Progress Report message will surface.
Click Proceed to cancel.
If you do not want to cancel, then select Cancel.
63. Click Proceed.
64. A success message will appear advising that this process may take time to reflect.
65. After a couple of minutes, refresh your page. The cancelled Report will be removed.
Click Exit to continue.
That's it. You're done! Congratulations on completing this tutorial.
Here's an interactive tutorial
Next step
Submit a learning capture
Submit an observation capture
Add a comment to an observation capture
Submit a rotation progress report (Basic training only)
Submit a phase progress report (Basic training only)
Basic Trainee checks exam result
Submit a rotation progress report (Advanced training only)